 Digital marketers have debated the case for inbound marketing vs. outbound marketing somewhere around 224,000 times (give or take a few thousand) according to a cursory Google search. There are cases to be made for both approaches, but most industries probably lend themselves well to a careful balance between the two.
For instance, here are some examples of traditional outbound strategies that have stood the test of time: online advertising, TV ads (even if you don’t watch them, they still exist, right?), direct mailers, and trade shows. These tactics obviously would not perform well if left to stand on their own. However, paired with the right digital marketing touch, these elements can be just enough to push a campaign over the top.
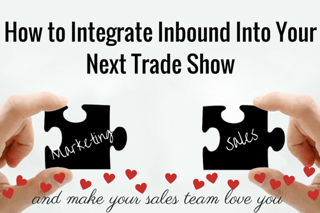
Given that the fall trade show season is just around the corner, there is still time for you to implement a particularly useful, inbound-outbound integrated approach! If you’re setting up a booth at an upcoming trade show, here are 7 easy steps to integrate inbound into your planning and win your sales team’s heart in the process:
STEP 1: Create a new campaign.
If you’re using a marketing automation platform like HubSpot, you’ll want to navigate to the Campaigns tool to create your new trade show campaign. This is a critical step as everything after this point will need to be attributed properly so that you’re better able to determine your success at the end.
Be sure to set SMART– specific, measurable, attainable, reasonable, and time-bound – goals for the metrics around the campaign which might include visits (both online and in-person), leads, and customers.
STEP 2: Build your contact list.
In order to start generating some buzz around your booth presence at the upcoming trade show, you’ll need to first generate a list of people to tell! Depending on the specific conference and your level of investment, you may or may not have access to a pre-show attendee list.
If that’s the case, you can simply import those contacts into your email marketing database. If you’re using HubSpot, you’ll want to upload this information to a static list. Be sure to give the list a descriptive name so that you or anybody else will know exactly where these contacts came from.
If you don’t have access to a pre-show attendee list, don’t worry! You’ll have to work a little harder to find the folks that plan to attend, but carefully implementing some inbound tactics will certainly help. Creating a mini-campaign to draw people into a pre-show offer they can’t refuse can be a very effective strategy if you promote your content in online areas attendees are likely to be.
STEP 3: Develop your trade show campaign content calendar.
If you’re going to truly get people excited for the upcoming trade show, you’re going to need to publish and promote some interesting content. Ever heard of FOMO? Use content to position yourself as the real industry go-to so that attendees will feel like they’re missing out on something by NOT visiting you or your booth.
Set up an editorial calendar to keep track of all the blog posts, social posts, offers and emails you’ll be pushing out. Tracking everything in a timeline or calendar view will help ensure that you’re not overwhelming people with too much or leaving them with too little.
STEP 4: Set up social monitoring streams.
Depending on how you monitor and publish your social posts, this step may different a bit. Feel free to adapt to your repertoire. If you use HubSpot, set up a number of streams to track online social interaction around the trade show. Here are a few examples of streams you could set up:
- Tradeshow name
- Official trade show hashtag
- Any or all trade show sponsors
- Speakers that will be performing
- Specific topics that will be covered
You should plan to check these streams periodically before, during and after the event, responding when it’s appropriate. You can also set up email notifications so that you can jump on connection opportunities immediately.
STEP 5: Draft and schedule your buzz-generating and follow-up emails.
Before you begin putting your pre-trade show emails together, you’ll need to figure out how exactly you’re going to incentivize attendees to stop by your booth. Are you going to offer them a takeaway goodie of some kind? Will they be able to register to win a spectacular prize?
Whatever you decide, you’ll want to start promoting the incentive before the trade show. If your email marketing efforts aren’t quite as developed as you’d like, here’s a great post about figuring out email design, content, and personalization. On the other hand, if you’re more of a seasoned email marketer, you can check this post to make sure you’re not following outdated tips and tricks that don’t actually work.
Keep in mind that you’ll want to continue promoting your incentive/presence to attendees who have yet to visit your booth throughout the show. Be sure to schedule your emails out accordingly.
And while you’re at it, it’s a good idea to go ahead and get those follow-up emails drafted and set up for sending. Tradeshows can be long and very tiring. The last thing you’re going to want to do when you return to the office is putting together a thoughtful and clever email to the folks that stopped by your booth.
Even if you can’t officially schedule this within your marketing platform, your post-trade show self will surely be thanking your planning-self for knocking out the hard part when the time comes to send.
STEP 6: Create your in-person lead capturing system.
If you’ve successfully implemented the first five steps, you’ll need to be prepared for attendees actually visiting you at your booth! In addition to securing the takeaway or whatever it is that you’re offering, you’re going to need a way to track and capture the information of booth visitors.
The simplest way to achieve this? Create a simple trade show-specific landing page with an appropriate form that each person can quickly fill in and submit on a tablet or laptop.
Both the form and landing page need to be straightforward and to the point. The form should only feature the most important fields to avoid scaring visitors off – name, email, company name, and maybe job title. The landing page copy should present the offer and provide a very brief explanation as to how one can receive the offer.
Since multiple people will be filling out the form on the landing page, be sure to disable cookie tracking so that each and every form submission is accounted for. Your sales team is likely going to want to follow up with these folks they may consider to be warmer leads!
You’ll also want to create a list that captures these leads so that you can send the follow-up emails you created in step 5 after the show ends.
STEP 7: Analyze your success!
When the last of your follow-up communication has gone out, wait a couple of days to dig into the results of all your hard work. Using your campaign tracking tool, analyze how each of the campaign assets performed and whether or not you met the SMART goals you originally set.
If you put in the time and effort on the planning and preparation side, chances are good that you will have met and maybe even exceeded your goals! If that’s the case, you’ll have an excellent list of sales-ready leads to hand off to your team…which they will absolutely love you for!