Customizing eCommerce systems is often a struggle for many small to medium sized businesses who simply don’t have the development power to facilitate those functions. Here at Revenue River, we see and build custom solutions to deliver innovative campaigns, intricate data analysis and modern automations every day. Because of that, we’ve seen and uncovered tons of simple hacks to seemingly impossible challenges to deliver cost effective applications with high ROIs.
One of those simple hacks is using the automation tool, Zapier. It’s a great way to fill in gaps in your systems’ integrations and automate common manual processes. With software like Shopify, we often use it to integrate with the CRM, Sales Marketing platform, HubSpot in order to connect sales processes with eCommerce stores and generate more intuitive marketing campaigns than what is natively offered.
In this blog, I’m going to walk you through how to use a Zapier webhook to send information from Shopify to HubSpot for an eCommerce account campaign. Rather than adding more apps for each specific campaign that would include the ‘account invite URL’, this Zap is going to take that ‘account invite URL’ and send it to HubSpot for any number of application types.
One example of how we use this URL in HubSpot is off of a workflow and Zap we built to create a customer account in Shopify following a specific action or closed deal in HubSpot. Once that customer account is created in Shopify, we automatically send them an invitation sequence from HubSpot to complete the set up of their account.
Here’s how it’s done.
Shopify has an email that can be sent to customers who have been manually added to the store. This email notification includes a unique ‘invite URL’ that is populated dynamically within the system, but is not a field that can be easily accessed or integrated into other marketing automation tools. There’s also not a lot of great detail around how to use this function. As illustrated in Shopify’s community post from way back in 2015, they unveiled this POST action, but didn’t include a lot of information on how to use it.
Below is what it looks like in the email template.

So here’s a step by step breakdown on how to send that dynamic URL to HubSpot (or anything that will accept the values that manages your customer data) using Zapier – my favorite secret weapon for automation.
Required:
- Shopify Store integrated with HubSpot
- Zapier account
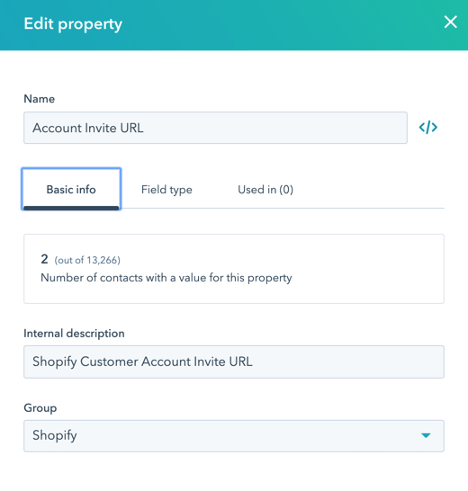
1. Create the contact property in HubSpot for where this URL will be populated.
A single-line of text is what I used.
2. Create customer manually in Shopify
Do not enable or activate their account. This is a required condition that allows you to both test the triggers in Zapier AND trigger the URL to be populated. If you don't know how to manually add a customer, here's instructions from Shopify.
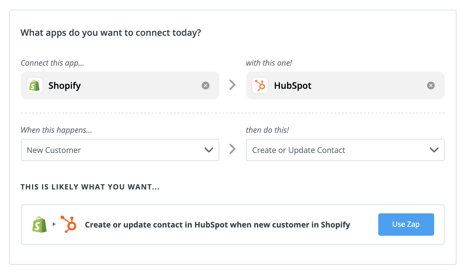
3. Create new Zap
Open your Zapier account and click Use the New Customer Trigger for Shopify to update a Contact in HubSpot.
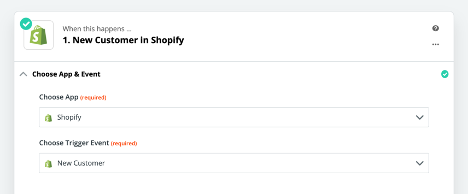
4. Follow the steps to connect your Shopify store account
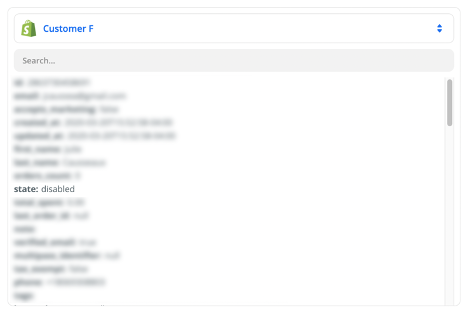
Then under ‘Find Data’, select the customer account you just created. This account should have a ‘state’ of ‘disabled’.
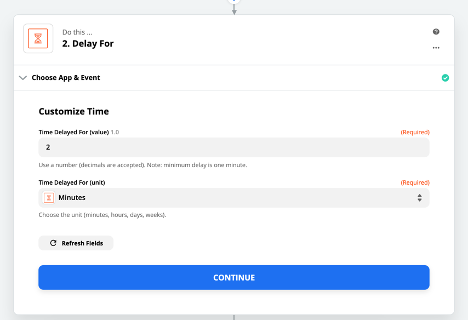
5. Create a delay
I used these as a safeguard in case there is ever a lag between the systems. This will (should) ensure that the customer will be created in HubSpot as a contact prior to checking for the record and updating the URL property you just created.
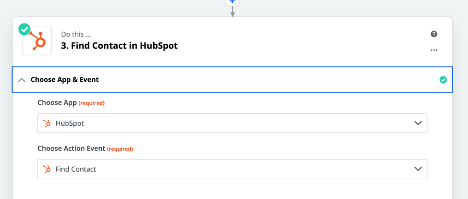
6. Add the ‘Find a Contact’ action for HubSpot
Once a new Shopify customer is created in Shopify, this is going to ‘check’ for the matching contact record in your HubSpot account.
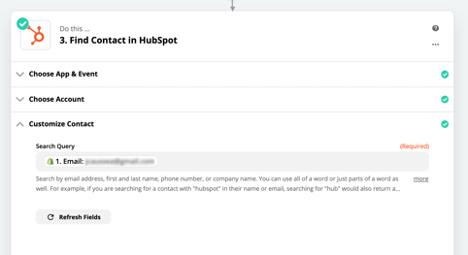
7. For ‘Customize Contact’, select the Shopify customer’s email address
This again should be the same customer account that you created earlier. You’ll have to test this step like the others.
8. Create a ‘Path’ action in your Zap

Not all customer accounts will be created that will require an invite – this is going to check the ‘state’ of those. ‘Account State’ should already be a contact property that is dynamically pushed over to your HubSpot contact record when it is updated in Shopify. Since you won’t be actioning on those that do not meet the other criteria, you’ll only need one path for this instance.
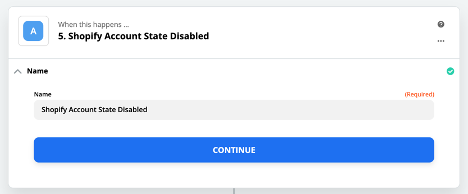
You should be able to name this path – I named mine “Shopify Account State Disabled”.
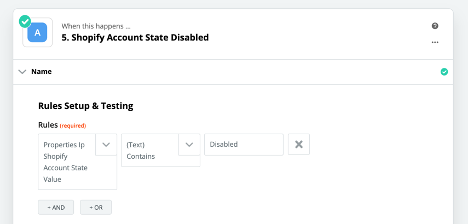
9. Set your conditions to continue down this path
You will want to check the ‘Account State’ value for Text Containing ‘Disabled’. This means that the customer account was manually created, bulk added through an import or added with some other automation/integration. Those are the accounts you’ll want to generate an invite URL for.
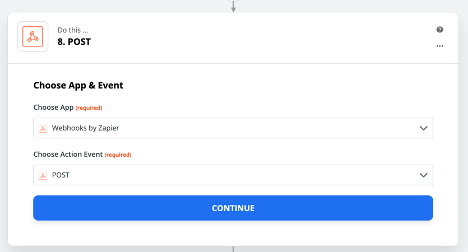
10. Create a POST webhook as your next Zap action
This is going to create the URL pulling data from your Shopify Account.
11. Get your Shopify API Key and Password
To get the POST URL for this Zap step, you need to go back into your Shopify store and create a Private App API information. To do so, open your Shopify store and Click ‘APPs’. At the bottom of your apps page will be a small link to ‘Manage private apps’. Click that then ‘Create a new private app’

For ‘Admin API’, give read and write access to all customer details and groups.

12. Once Created, you’ll want to copy the ‘example URL’
The structure of that is: https://{apikey}:{password}@{hostname}/admin/api/{version}/{resource}.json
13. Replace the URL Path and Query string
The structure of that URL path and query string should include the below which is found in the Shopify Developer page.
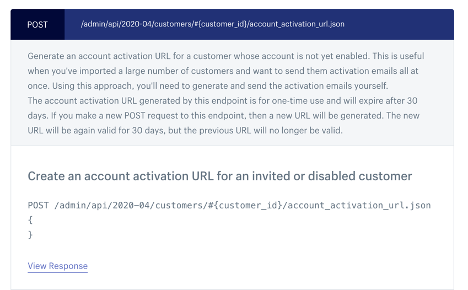
After adjusting what you got from your Shopify API and the string from the above, your URL should look like the below.
https://{apikey}:{password}@{hostname}/admin/api/2020-04/customers/#{customer_id}/account_activation_url.json
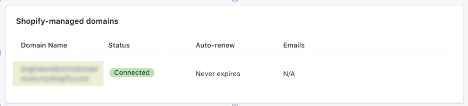
Your Hostname is found in your Shopify store by going to Online Store > Domains. It’s the ‘Domain Name’ value. See below. You’ll use the whole thing – including the ‘.myshopify.com’
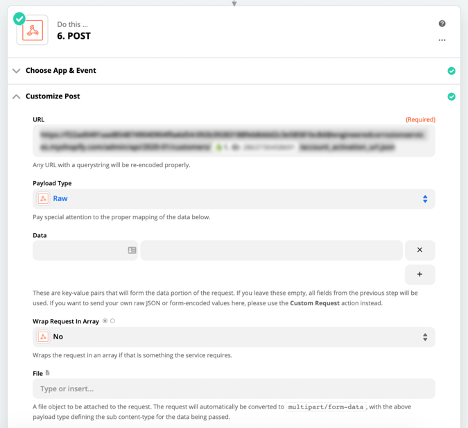
14. Copy that URL into the URL field to the ‘POST’ Webhook action in the Zap you were building
15. Replace #{customer_id} with the dynamic Shopify Customer ID Value
To do so, when clicking into the URL field, you should get an ‘insert data’ drop down. Open the Shopify data and select the ‘ID’ field.
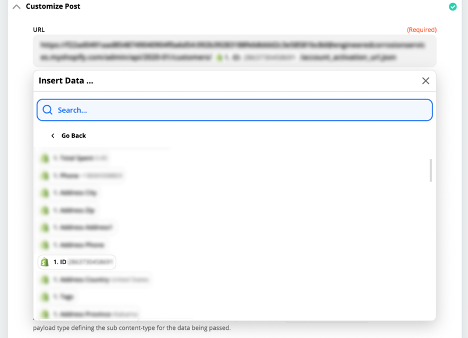
That should then replace placeholder that was there before.
16. Adjust POST Webhook Settings
- Set payload to ‘RAW’
- Set ‘Wrap Request in Array’ to ‘No'
- Set ‘Unflatten’ to ‘Yes’
17. To complete this POST action, test send the data to confirm validity
Once approved, click continue to create the next step in your Zap.
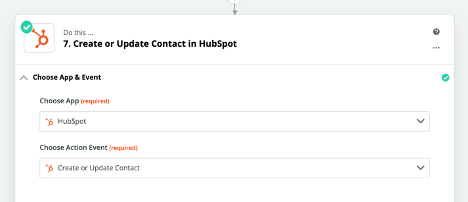
18. Add the next action in your Zap - ‘Create or Update Contact’ in ‘HubSpot’
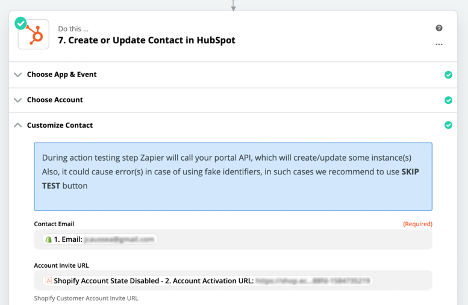
19. Set the 'Customize Contact' values
Under ‘Customize Contact’, select the Shopify customer account email data value for the ‘email’ and add the Account Invite URL string from the previous Zapier step to the HubSpot property, ‘Account Invite URL’ that you created in Step 1.
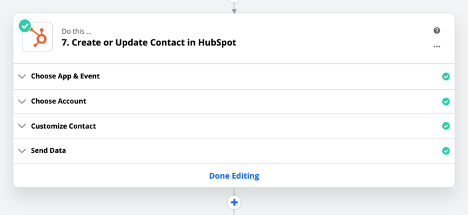
20. Test the data
Continue to the next step in completing this action by testing the data. Once complete and confirmed, your Zap should be ready to turn on and test!
21. Turn on and run more tests
After turning on your Zap, run a few tests of your own by manually creating customers in Shopify. Check the contact record values in HubSpot as well as the ‘History’ of your Zap to ensure that everything is triggering, filtering, and actioning properly. Once you’re satisfied with your new found campaign abilities, you’re can have this Zap run in the background continuously. Use this link to populate in SMS, email and any other personalized digital messaging to entice customers to create accounts in your Shopify store for future purchases.
Additional references and API documentation:
- https://community.shopify.com/c/API-Announcements/New-API-To-Retrieve-Customer-Account-Activation-URLs/td-p/280063
- https://shopify.dev/docs/admin-api/rest/reference/customers/customer#account_activation_url
For questions on this or any other eCommerce customizations, reach out to the Revenue River eCommerce team at ecommerce@revriv.com.