

Post updated on 10/2/2019
Sales lead response time? But why though?
The company that responds to a lead first greatly increases their chance of winning the deal. In fact, 78% of customers buy from whom they talk to first. There have been numerous studies have shown that response times within the first hour result in a 10 times greater likelihood of contacting the lead, and responses made within the first minute result in a 391% greater chance of closing the sale. Also if you have attribution in place you can tie the value of a lead to its source and reach out faster to the most valuable leads first. Focusing on contacting the most valuable, hot leads faster makes for a more efficient and successful sales team. Lead response time is fast becoming one of the most important KPIs you should be tracking.
Unfortunately HubSpot doesn't give you an easy way to measure this natively, but we’ve figured it out!
What to expect from this tutorial
You will have to jump through a few hoops but if sales or lead response time is a metric you’ve been pining after in HubSpot then we have a way to get it.
Before we start let's go over some prerequisites so you don’t have to read the whole tutorial before figuring out this is a bigger job than you thought.
What you will need:
- HubSpot: One of the following plans with workflows and you need a user with the proper permissions.
- HubSpot Marketing Pro or Enterprise
- HubSpot Sales Pro or Enterprise
- Zapier: Any of the paid plans because we will be setting up a multistep automation.
- Google Sheets: A free Google Account is enough
If you already have a solid understanding of these tools then this tutorial should take you about 45 minutes to an hour. If not, it will take longer. I’ve linked to some other good resources so you can consult them and learn as we go. When complete you will be able to create custom reports in HubSpot or you can send the data to any other reporting tool of your choice.
Watch the tutorial or read through the post below!
Copy Google sheet into your Google Drive
If you need help with Google you can learn how to create an account here and learn how to work with Google Sheets here.
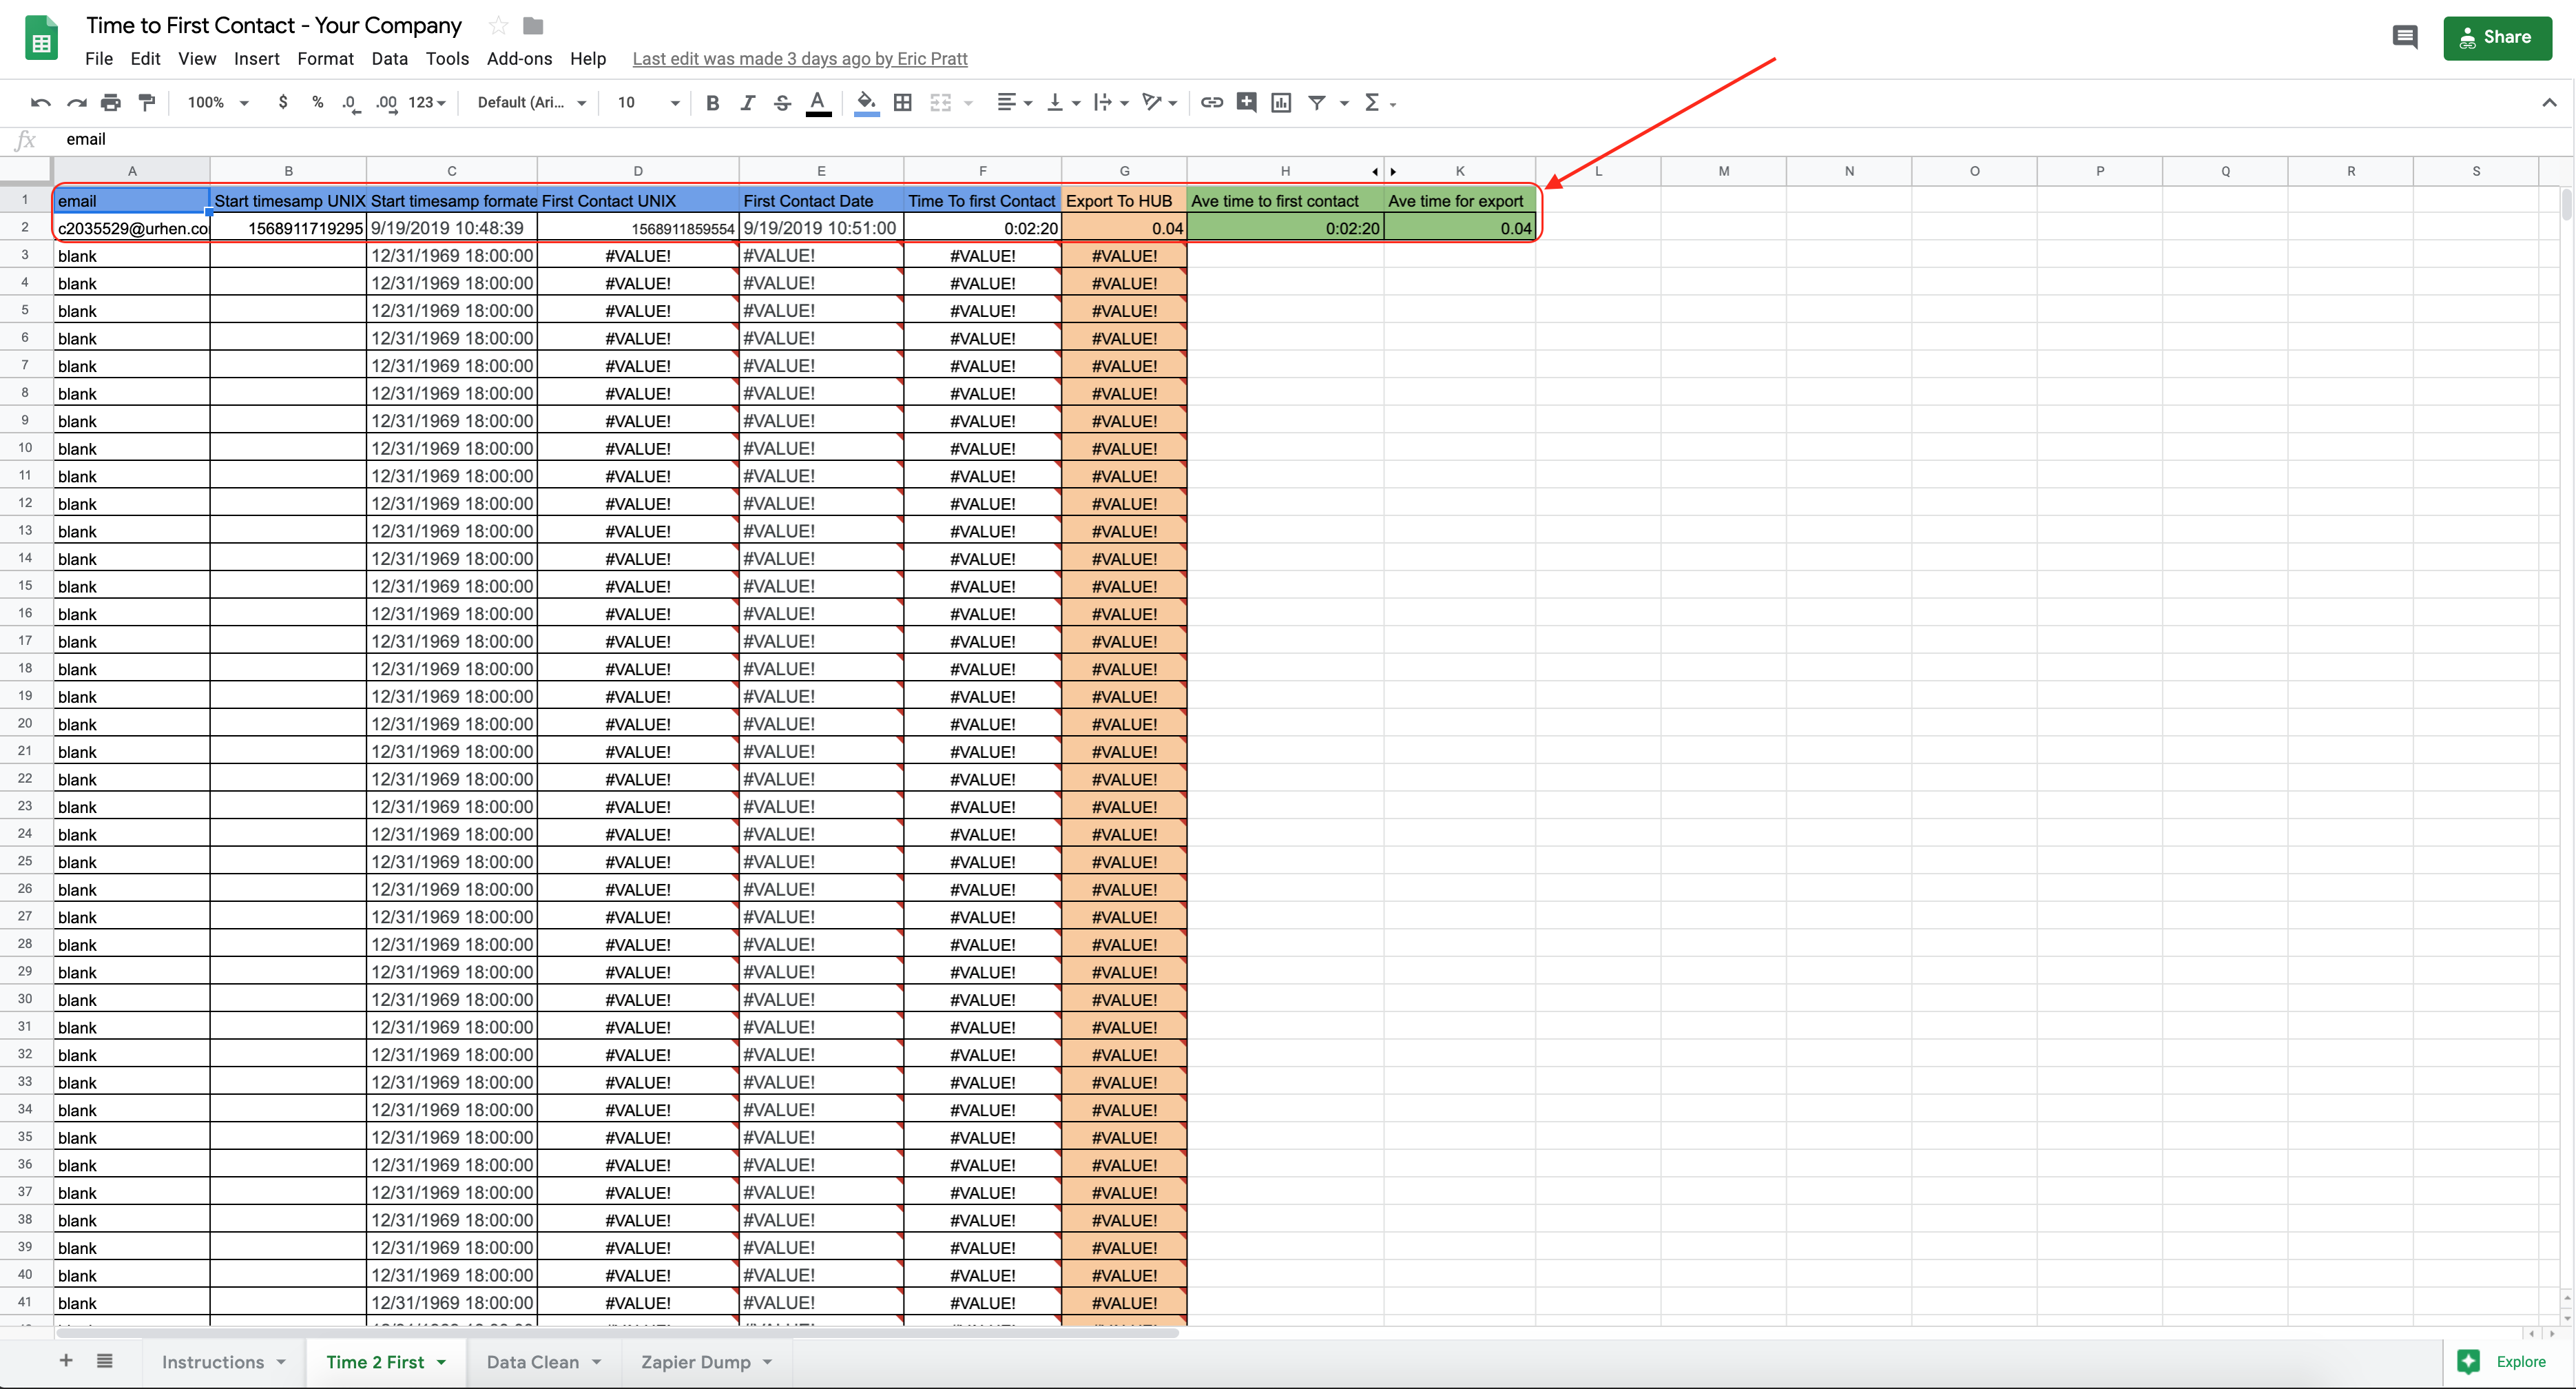
The heart of this build is a Google Sheet that I’ve linked below. The challenge when trying to get the first contact timestamp data from HubSpot is that it is buried in an API that isn’t separated into its own field. The Google Sheet does the work of identifying the time stamp info and separating into another field.
Another challenge is that HubSpot timestamps are in UNIX format which is basically a string of numbers. The Google Sheet also has a formula that converts the UNIX into MM/DD/AAAA HH:MM:SS format and into total hours/minutes to send back to HubSpot for reporting.
You will need to need to copy this Google Sheet into your Google Drive for use with your integrations with HubSpot and Zapier.
Set up HubSpot for sales lead response time
You need to make sure you have the correct HubSpot permissions to create workflows and contact properties.
If you do, first thing you will need to do is create two new contact properties.
The properties are as follows:
- Field Name: Lead Response Time (Hours). Field Type: Number field. (The Google Sheet also calculates minutes if you want to use that instead)
- Field Name: First contact timestamp. Field Type: Date picker.
Next you will need to create a HubSpot workflow.
Your enrollment trigger should contain the following: Activity type (call, meeting, email sent to contact)
Any other triggers you feel are appropriate for filtering out contacts that aren’t ready for the workflow can also be added. The goal is that you make sure that only contacts you want to go through this process actually do. Some other enrollment trigger ideas are:
- Lifecycle Stage
- Lead Status
- Contact Owner Assigned
- Deal Created

Next you will need to set the contact property we created earlier. Set the “First contact timestamp” to “date of step”.

Last part of the workflow is to trigger a webhook. However, before you can finalize and turn on the workflow we need to jump over to Zapier to get the webhook URL so we’ll come back to this in a second.
Using Zapier to send HubSpot timestamp data to Google Sheets
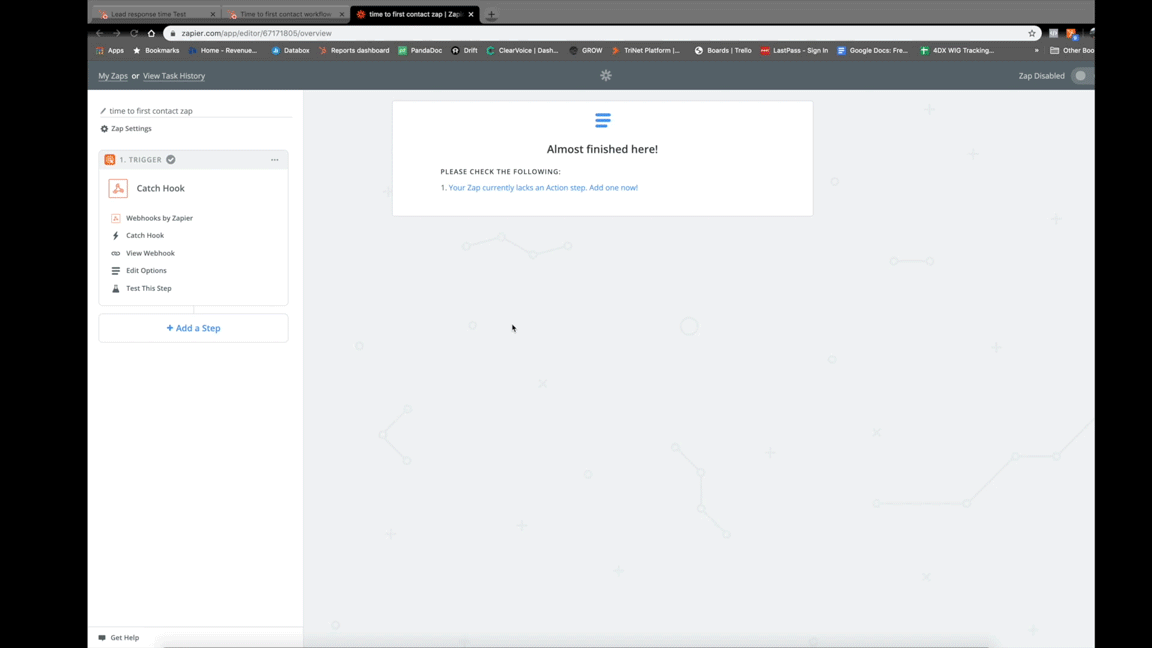
To capture the data we need out of HubSpot we need use the webhook function in Zapier rather than the HubSpot native integration.
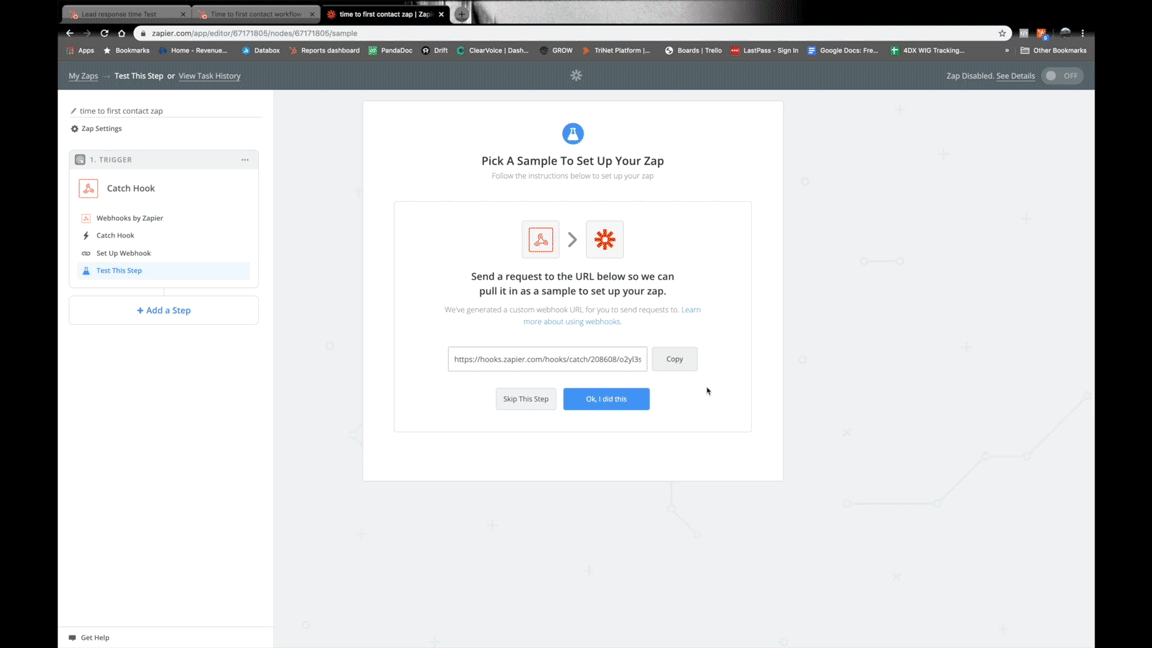
Create a new ZAP and select webhook as the first step. Continue through the steps until Zapier gives you the webhook URL. Copy and paste it into the webhook step of your HubSpot workflow.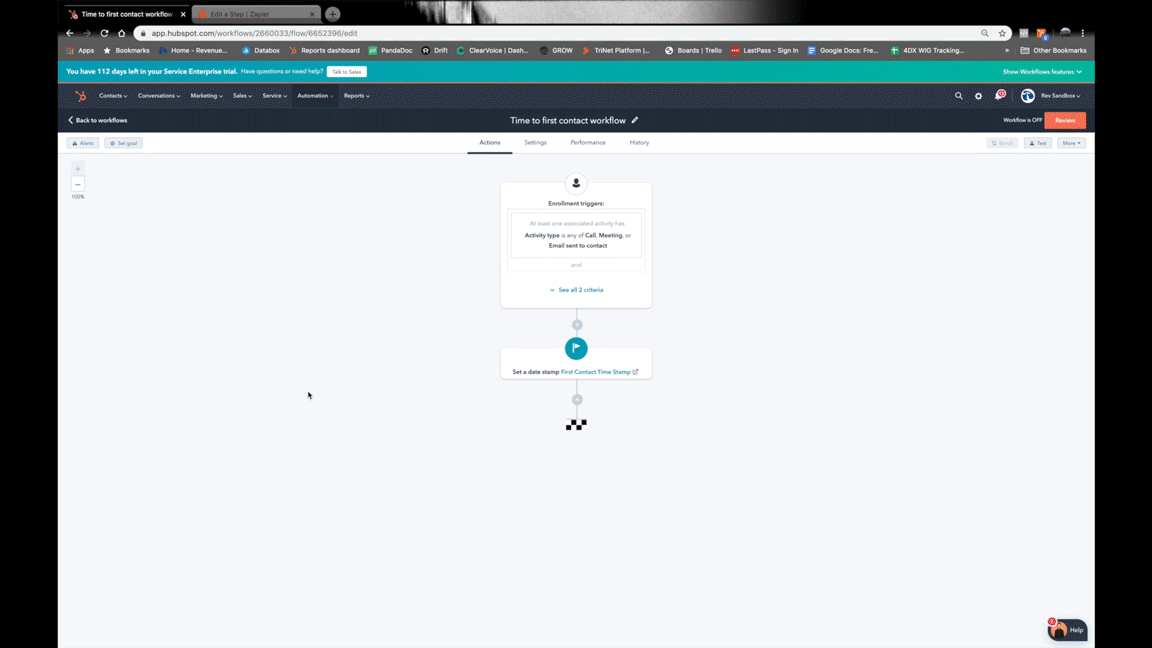
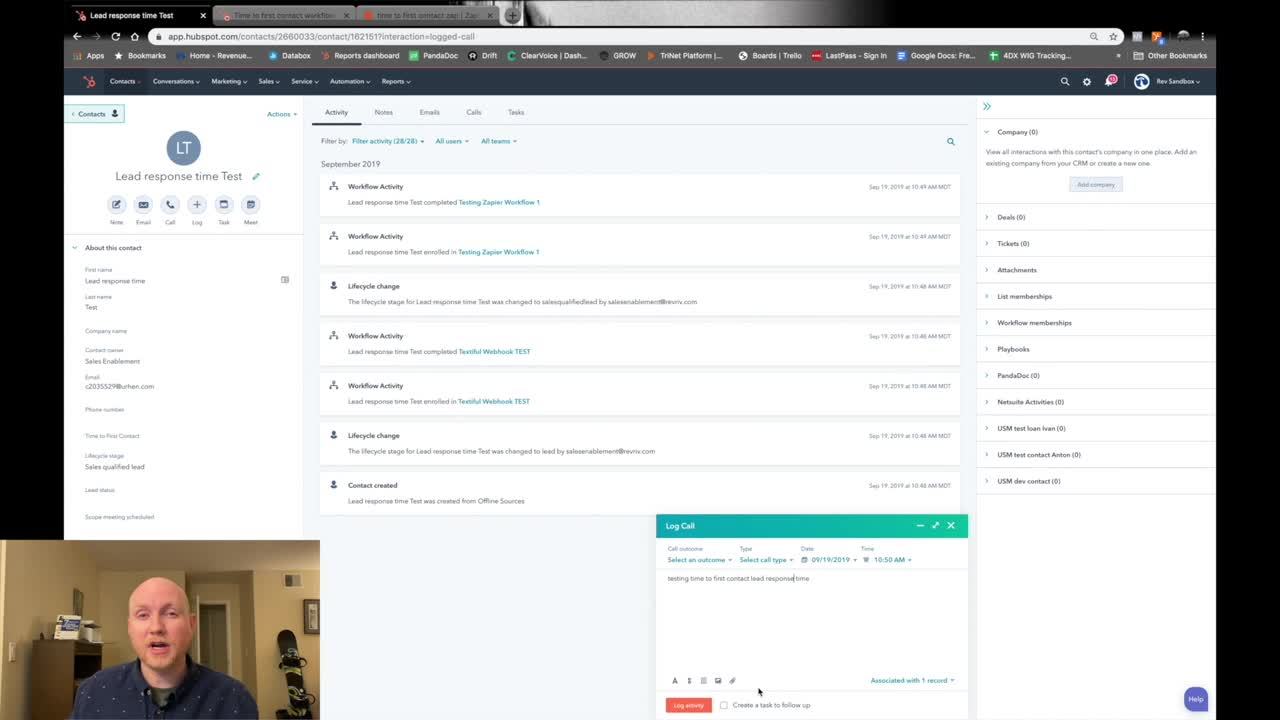
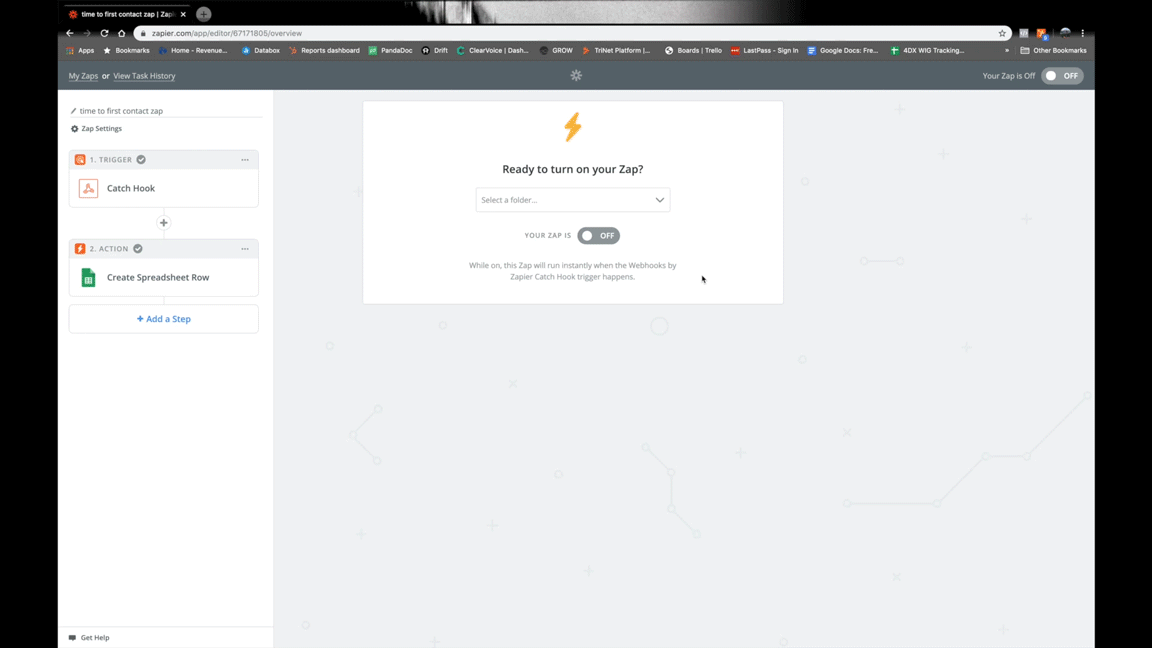
The next step Zapier will be to activate it so it can be ready to catch the data. Before you activate it you need to go back into HubSpot and turn on your workflow. Make sure Re-enrollment is off and don't enroll contacts that are already qualified. You will need to create a new contact that meets the enrollment trigger criteria. Before you finalize (by adding a logged activity on that new contact) go back to Zapier and activate the webhook so it is listening for the data. Then, go back to HubSpot, make sure the workflow is on, go to your new contact and log an activity. You will know it was done correctly when Zapier has caught a hook and displays a preview of the info it captured with "Hook A".
Now that HubSpot and Zapier have communicated you can tell Zapier what you want it to do with the data.
Your next step will be to connect the ZAP to the Google Sheet that you copied over to your drive earlier. You will need to select “Create Spreadsheet Row” and select the worksheet “Zapier Dump”. In the Zapier Data field you will need to find the “First contact timestamp” property we created earlier. Unfortunately we can’t simply use the value that is in that property because when HubSpot fills in the date it doesn’t include hours or minutes. Our workaround for this is to use the field right below it called “Properties First Contact Timestamp Versions” because it contains time info as well.
Test the step and make sure the data is being sent to the google sheet on all worksheets. There should be new info in column D “First contact UNIX” which is the parsed out timestamp.
Common Issue: If the timestamp data didn’t show up on the “Time 2 First” worksheet but is arriving to the “Zapier Dump” sheet then there is probably an issue with in the “Data Clean” worksheet. Check cell A4 and see that the formula is =TRANSPOSE('Zapier Dump'!$A$2:A2536) If it still isn’t showing up, go to the “Time 2 First” worksheet look at the look at cell D2 which should have this formula: =TRANSPOSE('Data Clean'!$A$12:$CPZ$12). Toggle the $A$12 to $A$11 press enter then back to $A$12 and press enter again. These issues only seem to happen when Zapier sends over info for the first time. After that first time it should work without any issue.

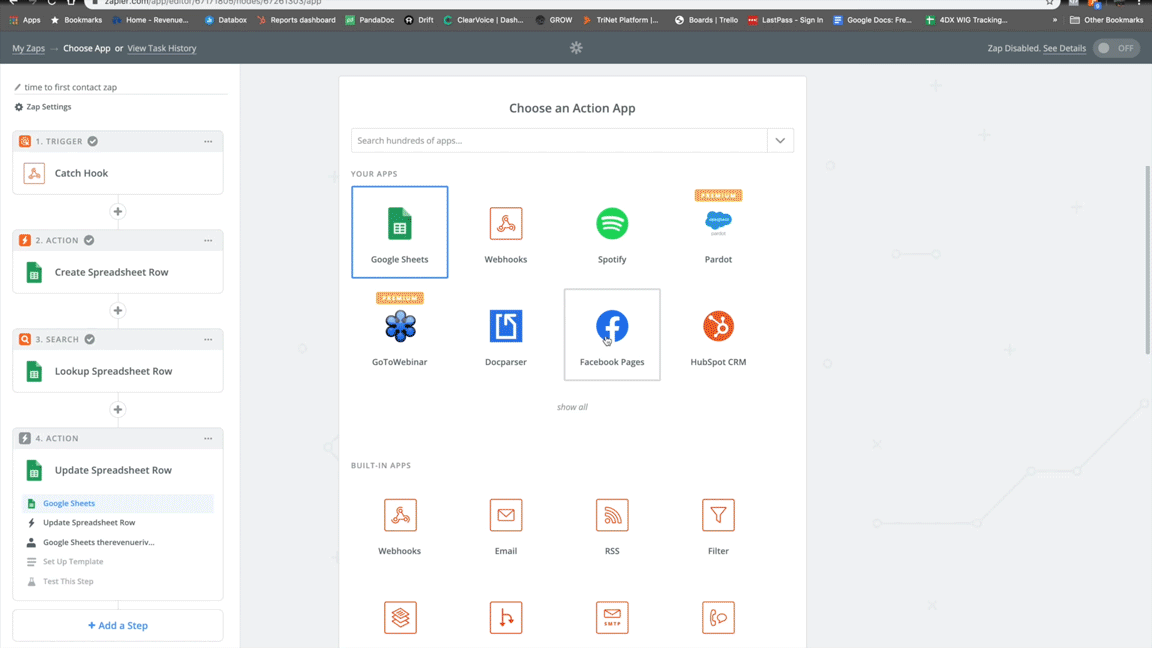
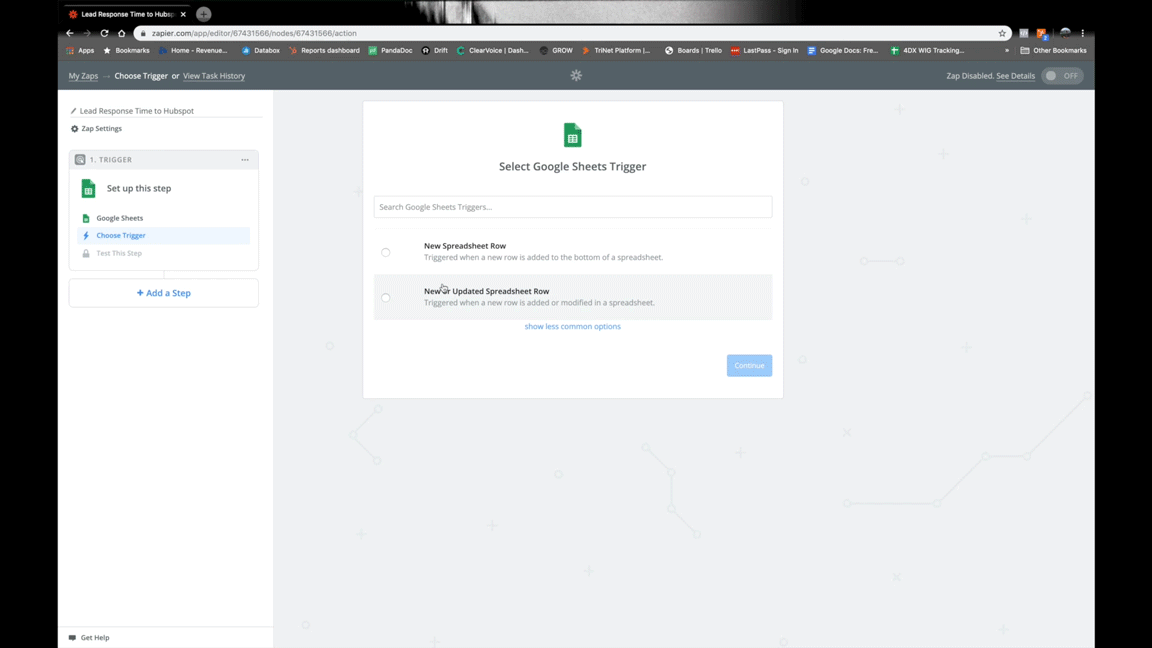
The next step in the Zap is also going to be with Google Sheets. Select “Update Spreadsheet Row” then the worksheet “Time 2 First”. Under "Row" you will need to choose “Lookup Spreadsheet Row”.
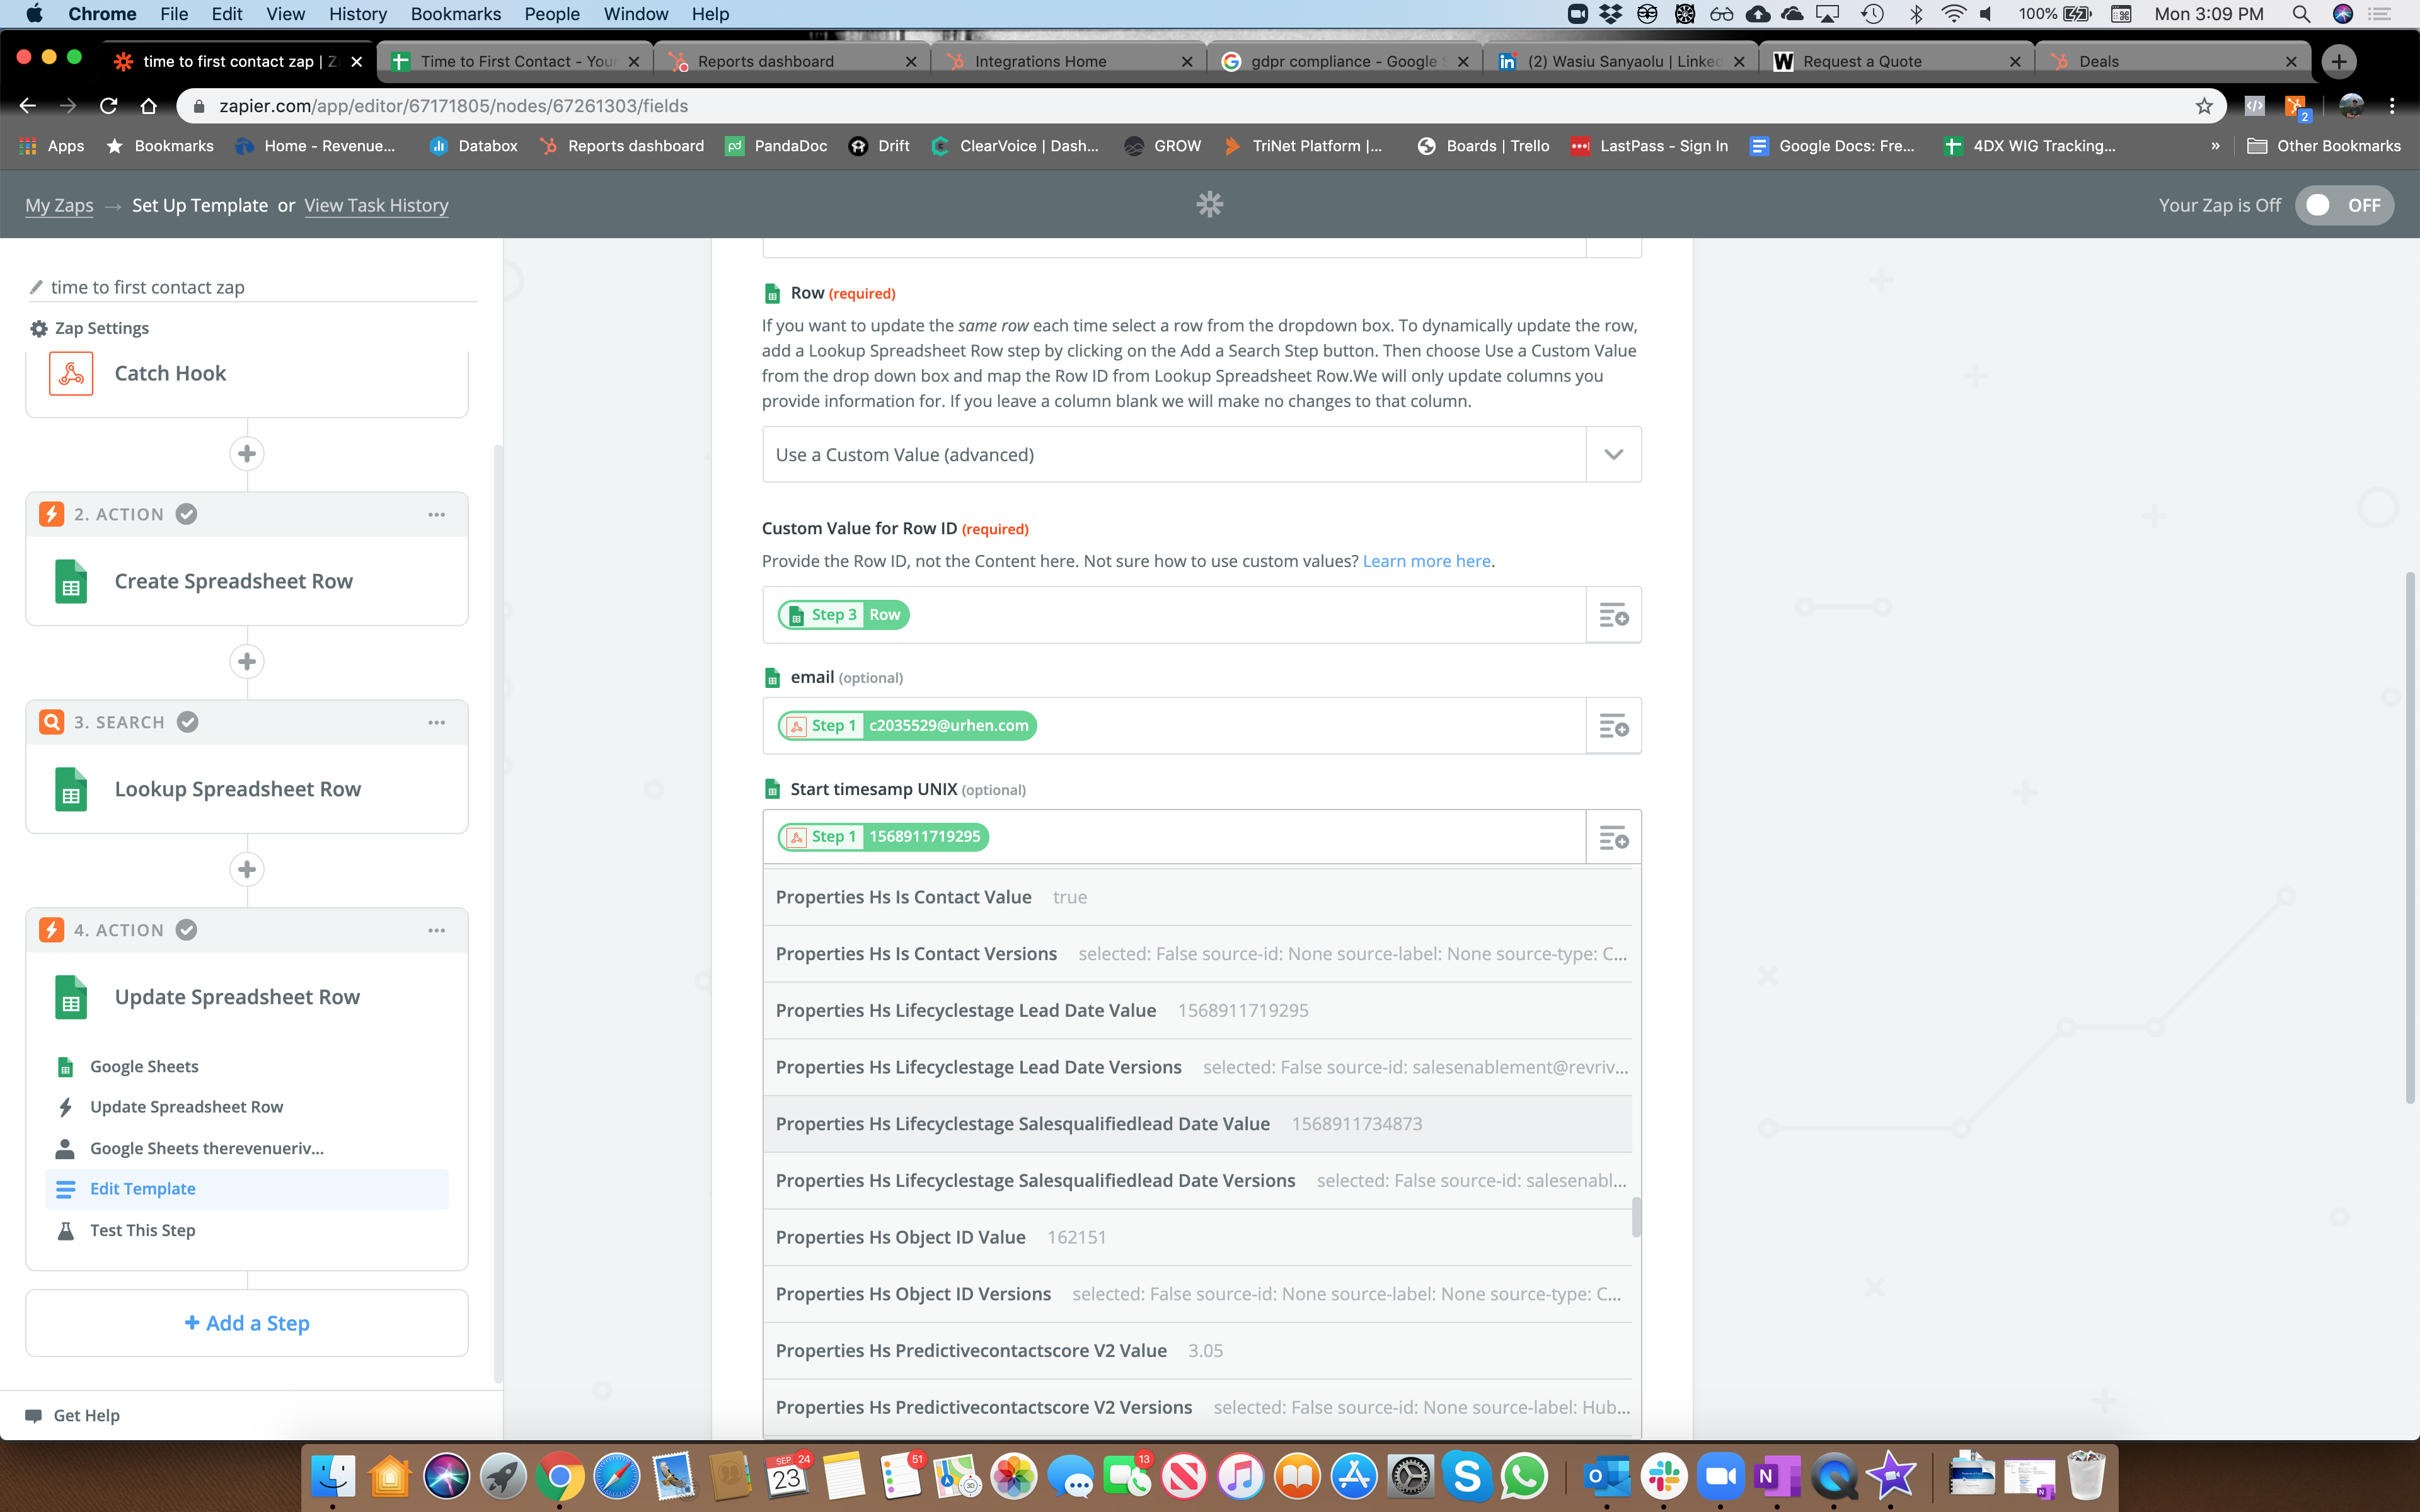
You will need to select the time “Time 2 First” worksheet again. Select “email” for the lookup column and type in “blank” under lookup value. Zapier will insert a lookup step before the step you added so pop back into the update spreadsheet row step you were working on by clicking edit template. The Row ID will be filled with the lookup parameter “step 3: Row”.
Next you will need fill in the email field with “email” from the webhook.

This next step will take some discretion on your part because it really depends on what timestamp you are measuring. We are tracking when the sales person reached out as one data point, so for the other one you could look at lifecycle stage like SQL, lead status like active, deal creation, contact assigned to rep, contact creation date... etc. This first data point should also be one of your enrollment triggers for your HubSpot workflow. The point is we need to have a good starting point to measure from so we can see how long it is taking sales people to reach out to their prospects. The only thing you need to make sure is that you are using a timestamp in the UNIX format which is the standard way HubSpot sends date and time info through their webhook API.
Test the step and make sure it is populating the Google Sheet. If all is showing up then you are ready to turn the ZAP on and move onto the last step.
Obs: The formula in the google sheet which converts the UNIX time stamp to a normal date and time is putting everything in Mountain Time (my time zone). Because, we are measuring duration, the time zone the time stamps are in don't really matter, as long as they are the same. If you want the time to show up in your time zone you will need to change the formula in the cell where we do the UNIX conversion.
Send lead response time data back to HubSpot
Now that all the info we need is population the Google Sheet, the formulas there should be converting the UNIX timestamps into dates/hours/minutes and then calculating how many total hours/minutes it took for the prospect to be contacted. We now just need to send that info back to HubSpot for reporting.
You will need to create another Zap in Zapier and can name it “Lead Response Time to HubSpot”. The first step needs to be Google Sheets and select “New or Updated spreadsheet row”. Select the worksheet “Time 2 First” and set the Trigger Column to “email”. Test and move onto the next step.
The final step is the HubSpot integration. Select “Create or Update Contact”. Set the Contact email to the “email” column and find the “Lead Response Time (Hours)” property we created from the list and set it to “export to hub” column from the google sheet. Make sure you Skip Test because otherwise Zapier might send a blank user to HubSpot. Now just continue and Turn it on.

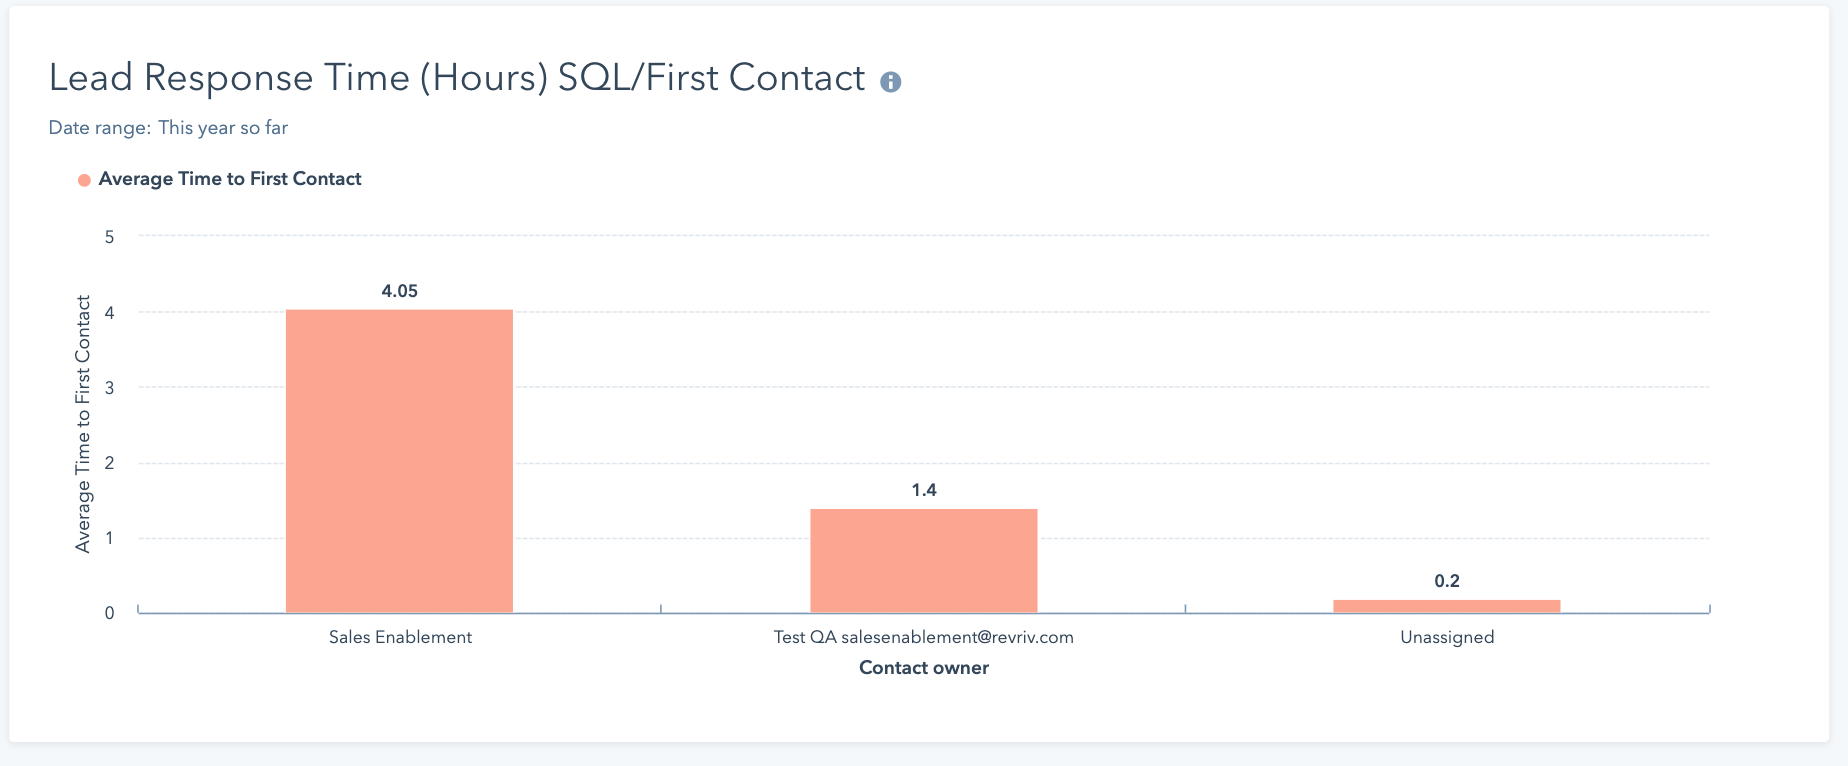
That’s it! You now have lead response time in HubSpot and can run reports on top of it. The Google Sheet also has a running average if you want to use that data. I created this Google Sheet to handle about 2500 contacts so if you end up with more than that you can just create a new sheet and point Zapier to it.
If you have any questions my LinkedIn is below. Feel free to reach out and I would be happy to troubleshoot any part of this tutorial with you.
Good luck and thanks for reading!